Help Files
2. Filtering, Viewing, Recording, Generating flash files
1) The files currently imported are in various sizes and formats, the worst thing is that some of the image files have huge sizes, for example 10MB for a single image file, frequently you can encounter images which are 4 times bigger than your PC screen. This is resulted by the designers who requires high resolution or by none professional photographers. It is very wasteful storing such large image files for ordinary image viewing purpose. It will cause slow execution of any program.
2) Now that we had pasted the files into our own album subfolders 0/1/2..., we can control the sizes of the files, making the dimension of any picture less than the dimension of the PC screen. It appears that we need a Size Filer.
3) Click the second tool button from the right end of the tool bar, i.e., the Start Album Viewer button (which people say like a targeting icon). The filtering process started. It's a powerful filter in function. After completion of filtering we suggest you take your mouse and playing about the super power image album viewer, which provides rich dynamical viewing/recording/replaying functions. The most important thing is that you can enter into a Teaching Mode by double clicking the left button of the mouse, then learning about the special operations of Sightline Media following the textual guidance. You can exit the Teaching Mode by double clicking again, then exit the Album Viewer by choosing in the right button context menu Exit command. Now have a look in your album subfolders, they were filtered into BMP files, and sequentially named 0.bmp, 1.bmp, 2.bmp...
4) Now let's click in the left list box on a thumbnail, it will cause the image be displayed in real actual pixel dimensions. Click again on the zoomed actual size image, now the image will be displayed in full screen (Note you can switch pictures by turning the middle wheel after either click). Now continue click on the full screen image, we entered into dynamical state (movie Creator)(You can also directly enter into the Creator from the list box interface by choosing the Play command in the right button context menu).
5) Within the dynamical displaying state we have the core functions of CommonPhotoStar software. By pressing down the right button of the mouse, the context menu occur, here you can find key functions such as Record and toFlash.

6) Now press down the right button of the mouse (keeping pressed), and moving the mouse cursor onto the Record menu item, then release the right button, thus we entered into picture recording state. Note: the actual recording has not started yet! This provided opportunities for users choosing a starting position of the record by shifting the positions of the mouse. Meanwhile in this state you can also adjust the initial zooming setting of the "lens". Practice please.
7) The real recording starts when pressing down the left button of the mouse. Keeping pressed and move the mouse on the zoomed picture, you got the feeling of lens photographing; Just don't release the left button, meanwhile keeping moving the mouse and turning the middle wheel of the mouse with your middle finger to adjust the zooming rate of the lens. Take time completing the recording process since the Trial version of this software only allows 5 seconds of recording time (registered standard version could record 50 seconds). On timing out it will automatically enter the replaying state. You can also decide terminating recording before timing out by releasing the left button. Don't worry about saving what you recorded, because the software will automatically save it.
8) The actual results of recording are determined by many factors. First of all, the size of your picture should better be large enough, e.g., the same size as PC screen. According to our experience common images of 800*600 could also give us good result. Even tiny images of 320*240 could also gives good effects at full screen replaying if, the viewers stand off the PC screen at a long enough distance. It's the same reason why you shouldn't watch TV screen nearby. For 320*240 small images after recording and replaying at full screen state he who stands 2 meters away will not feel mosaic. Besides, you may decide take what you recorded onto web pages (shown as Flash), then you can record for smaller images in order to transmit with fast speed, meanwhile keeping good qualities.
9) For understanding the recording process described above, it is easy comparing with what shall be described bellow - on the considerations concerning the image width/height ratio.
10) For those common big-width-and-small-height wide pictures (Horizon), it is very easy to make good recording (since PC display is Horizon),just zooming the pictures, making it bigger than the screen, then moving the mouse in a controlled way, preventing occurring black edges, so that when replaying people could not see the edges of the pictures, in his imagination it's endless natural scenes without end edges (he should not know it's only a picture!).
11) However, photographers frequently turn their cameras 90 degrees during taking pictures. Thus in actual fact we could have small-width-and-big-height tall pictures (Portrait), how to record for such pictures? Well, before really starting to record, let's use mouse wheel to zoom in the picture, making the sides of the picture expanding, till exceeding the screen width! Then while recording pay attention prefer taking vertical scenes.
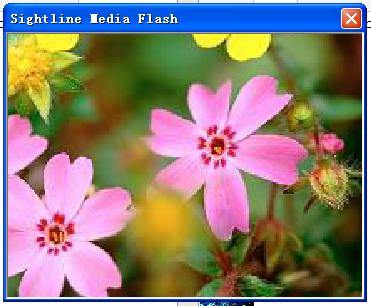
12) Now it's time for us entering into the most important part of learning --- outputting flash. After recording, while it's in auto replaying mode, just pressing down the right button of the mouse, and moving mouse cursor onto the toFlash menu item, then releasing, wait for a minute, a Sightline Media Flash dialog box will occur, it shows your recording result in original flash dimensions which is just the picture dimensions (Note you may have Filtered).
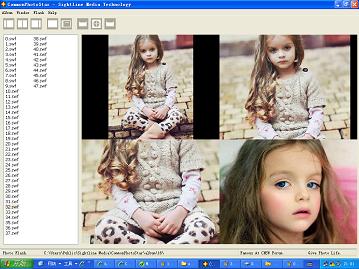
13) At this moment, you can close the Sightline Media Flash dialog box by clicking the left button of the mouse, and then recording for other pictures; however, if you clicked the right button on the Sightline Media Flash dialog box, you will be entering into Flash File Player interface (Note either clicking the left or the right buttons will cause the generated flash going into the list box of the Flash File Player).
14) Another way entering into the Flash File Player interface is by directly clicking the 5th tool button (Flash File Player) in the tool bar. Note clicking the second time of this tool bar button will enter into Full Screen state, in which clicking the left button of the mouse can pause, clicking once more shall resume playing. Exit the Full Screen state by clicking the right button of the mouse.
15) Using the methods described above, you can record many pictures into flash movies, then in the Flash File Player watch the movies in full screen by right clicking the playing area, whilst wheeling the middle wheel of the mouse quickly switching to different flashes. Under the full Screen state if you double click the lift button of the mouse, you can get 4 windows playing simultaneously 4 different flashes. Another way of getting 4 windows is by clicking the white blank area of the list box in the Flash File Player, whether 4 windows could occur or not is determined by the current playing position in the list box, to allowing 4 windows you should not be playing the last 3 flash files.
16) Click the right button of the mouse at the blanking area of the list box of the Flash File Player, you may choose from the context menu Auto Playing command, this will enable auto playing mode, flash files in the list box will be automatically played one by one. Here in the context menu there is also a Full Screen command, it's another way of switching into Full Screen state.
17) Now you have already learned how to record movies and outputting flash files (wait, we have yet something to mention). For horizon pictures after recording just output via toFlash menu, it's all so easy to handle. For portrait pictures we have already described how to record, and of cause can also output via toFlash command, getting vertical flash the same width and height as the portrait picture, which could be embedded into web pages. However, quite often, you need to get a horizon flash from recorded movies of a portrait picture. It is important to know you should not use the toFlash command any more. Instead you should use Portrait command. Since during recording you have zoomed the picture, making it bigger than the PC screen, that making both sides have no black edges, and nobody will know it's recorded with a portrait picture, thinking it's taken from real no-boundary natural scenes.
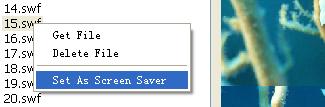
18) We have yet other good functions to mention. One of the recorded flash is so perfect, that we want to set as screen saver, replacing the rolling illusory transitional lines or the fish tank too beautiful to enjoy watching for ever.
Do we have the way turning a flash into screen saver? Yes indeed. While in Flash playing state, just click on the flash file you like most in the list box, choose from the context menu Set As Screen Saver command, and confirm to the pop up dialog box. To watch the screen saver you must minimize or exit CommonPhotoStar, the screen saver will occur one minute later. However, sometimes when it's the first time using the function, maybe you need to restart the computer.
19) Well, we can continue learning the next topic.