CommonPhotoStar Help
1. Beginner*s guide
Welcome to use CommonPhotoStar. This software is mainly meant as dynamical viewer for Photo/Pictures. Now let*s learn together how to use this software.
(1) Double click on the EXE file of CommonPhotoStar, it opens, the beginning interface looks like this:

(2) There is a Directory Tree on the left, which listed the local drives of your machine. Now click a drive, and open the folders to find your pictures, you have a lot of pictures, ain*t you?
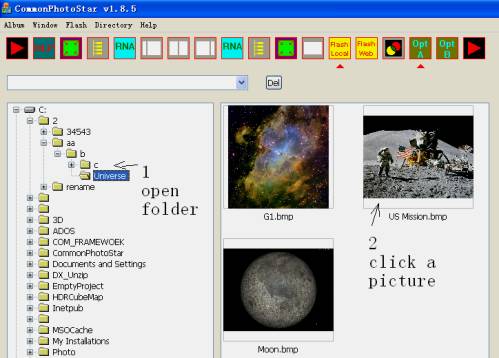
(3) Just click on any picture you want to watch(must be JPEG or Bitmap format for the time bing). The first click makes the picture shown as 1:1, to its real dimension. Now you got the chance to learn how big in fact your picture is.

(4) Now continue click, what happens? ye, looks bigger, in fact the picture zoomed to full screen.
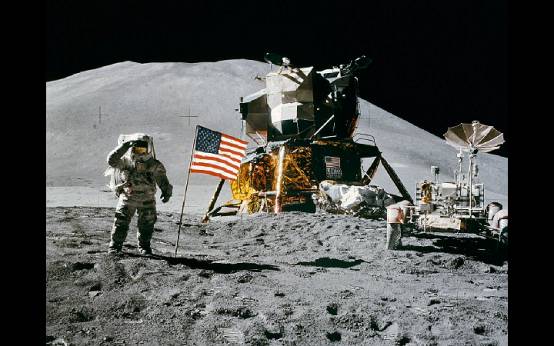
Our eyes enjoy watching a picture in full screen state, because now the picture is large enough and yet all contents are still within the limit of screen frame, didn't lost any.
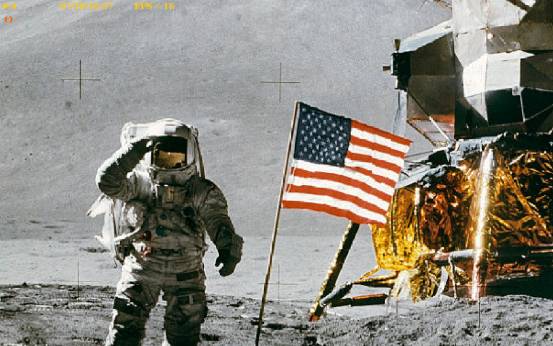
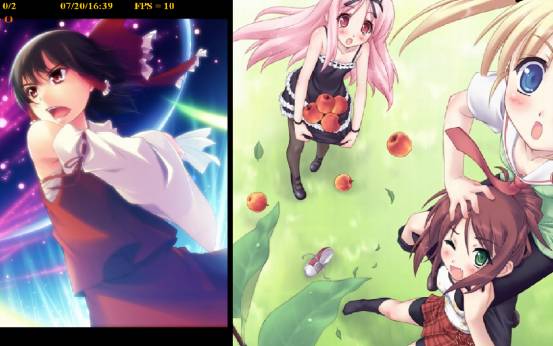
(5) Click! for the third time, continue. Oh, my picture got moving. Are we playing a game?
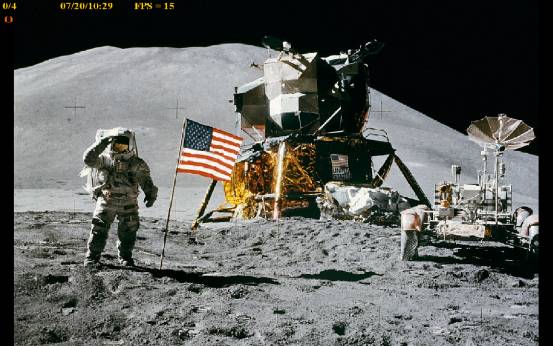
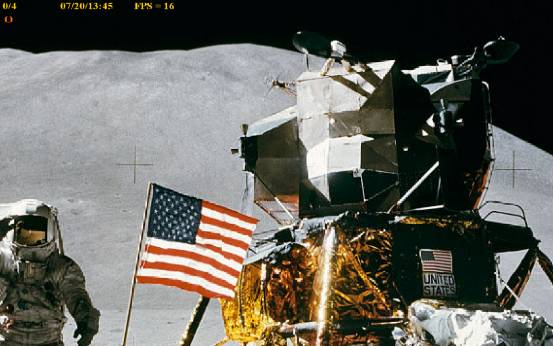
(6) Frame per second(FPS) is 15. July 20th, 10:29 now.
Press down the left button!!! and move the mouse, you become a virtual cameraman, ain*t you?
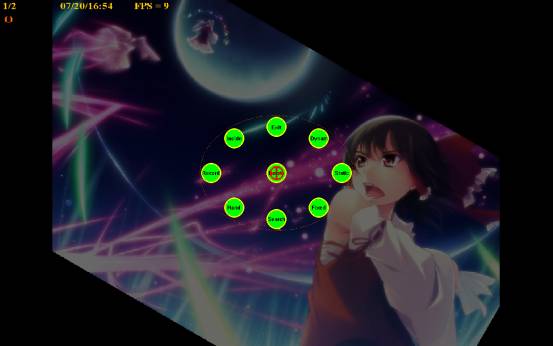
(7) After releasing the left button, click the right button.
There is a menu for you.
The Browser functions are all located here.
You can even record your browsing process, makes a movie.
And then, output your movie as flash SWF format.
So later on you will be able to put the very small size movie on your web page!
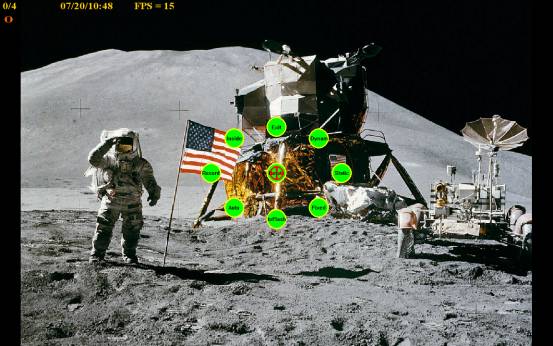
(8) Just move your mouse to the Record button, and release the right button of your mouse.
Now you already entered into recording state!
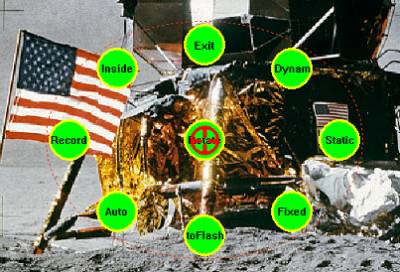
Move your mouse to choose a starting point as you like.
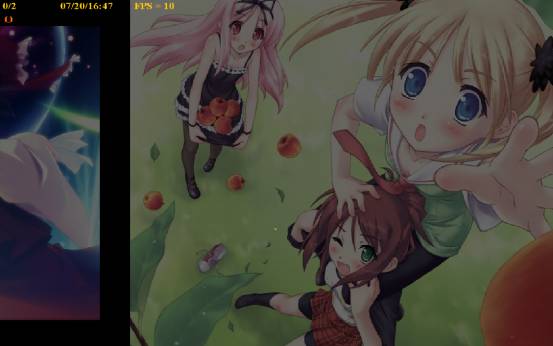
Press down the left button (don*t release) and browse (panning) the picture.
You browse (panning) the picture just like a photographer taking his scene, you even be able to zoom your lens, in or out, by rolling the middle wheel.
Be careful, not moving out of your picture! It*s a picture with boundaries in fact, not the real environment God laid for true photographers.
Your total recording duration for any picture is about one minute. But you can stop and play back at any time during recording by releasing the left button.
zoomed and panning to left-upper corner.
(9) What*s the next thing you want to do? Well, output to Flash format file, so that you can use the movie on your Web page. To do this, you should make sure the current movie is playing, and then, pressing the right button to show the menu, and drag the pointer to toFlash button and release.

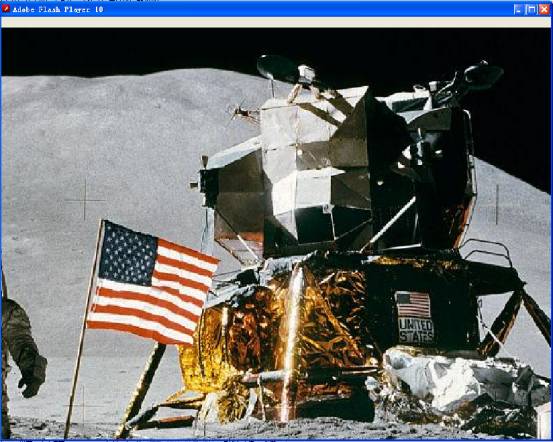
After releasing, system is busy for a while and then showing in front of you the Flash movie.
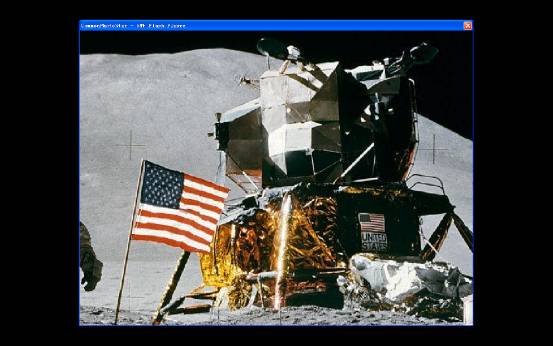
The flash player window shows the same width and height dimension as the flash*s size, or the picture*s dimension.
Clicking the left button, the flash player will close.
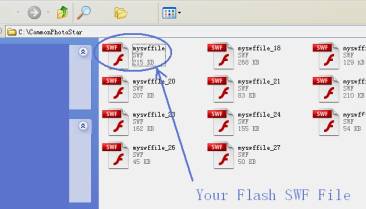
But where is the flash file? Well it*s already somewhere in the same folder as the CommonPhotoStar EXE file located. For easy routing, just click the View the Temporary Flash File button on the toolbar.
Thus two extra window opens. One is the Windows Explorer, opening to folder C:\CommonPhotoStar, inside you can find myswffile.swf.
The other window is Adobe Flash Player, allowing you resizing for getting the correct effects.
You can rename myswffile.swf to other name, such as myswffile_1.swf etc., avoiding overwriting on next operation, since every time it will output myswffile.swf only, for saving disk space.
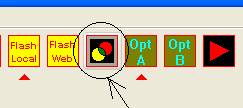
Here we pay attention to the tools again:

Opt A is the open source swf engine (SWFLIB), for this version of CommonPhotoStar, Opt A*s disadvantage is that it limited the equivalent size of JPEG file to 500KB, so if your picture size is very large, the engine will not work in a normal way. But this engine at least could produce flash SWF without watermark, already suitable for your business purpose.
Opt B is ActiveSWF engine. Here just test using, CommonPhotoStar team didn*t complete the purchasing process. Special thanks to Mikhail Kokarev of iSpring Solutions, Inc. for allowing test using ActiveSWF engine within this initial product. It*s obvious this option is better functioning, comparing with Opt A, within Opt B the rotation angle can also be reflected in the resulting flash file, and there is no limitation of the equivalent JPEG file size. Flash Local and Flash Web toolbar buttons can be used for Opt B only. Web flash SWF file size could be relatively smaller. Still Opt B*s shortcoming is that if user*s folder within the directory system is named in accordance with Unicode system, such as in Chinese character, the ActiveSWF engine will fail to work. We hope iSpring team could fix this problem in their future version. Right now, user of CommonPhotoStar should avoid Unicode chars in naming picture folders.
(10) It*s time we talk about the Temporary Movie window. there is a tool button for it:

By clicking this button, Temporary Movie window will be open.
Within this window, all the movies corresponding to the pictures you played are all there! you can do the same tricks as introduced above and re-exam your previous video cameraman works.
(11) Soon you*ll find your temporary window is jamming with too much temporary works. you*d better delete them all. Just click the Clean Movies button.
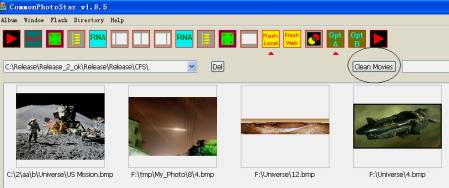
You maybe worrying whether you had deleted pictures or not by this action? OK, what it did, in fact just removed the movie data text files within a special folder, it will never delete the real pictures located within the various folders of your local machine. You can still view these pictures any time you need them, just don*t worry about.
(12) You may think within the temporary window it is a good picture collection. Can we make copies of these pictures and save them into a folder before deleting movies? Yes, you can. Just goto a ListView and find an empty folder, open this folder, right click, choose from menu Collect Pictures↙ From Movies, this way picture files will be copied into the folder, then you can use RNA tool button to rename all if necessary. (The RNA button can also rename sub-folders if the parent folder node is named in CFS series, such as CFS_1, CFS_2 ..., the limitation was set to prevent user misuse.)
2. Advanced user*s guide
As you have already noticed that there are Play from Left Movie List and Play from Right Movie List buttons on the toolbar. What*s their function? how to use?
Well, they are used to view your photo album.
A photo album is organized to a regular file system structure, such as below:
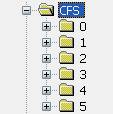
Open a folder, such as 0, let*s look what*s inside.
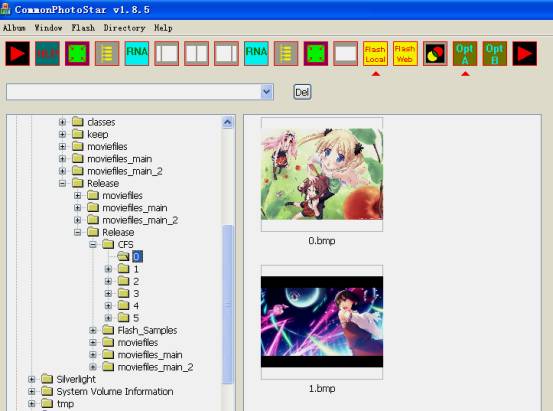
OK, you find two files here, 0.bmp and 1.bmp.
Your task is to expend files and folders, to nearly any number of files and folders. (Put into the photo of your child or friends, make special collections by directories)
But take care the number should sequencial , one by one, starting from 0. Such as 0,1,2,3,4,5,6,7 for folder series; 0.bmp, 1.bmp, 2.bmp, 3.bmp ... for pictures inside a folder.
Pictures only should be saved as bmp format for album usages. (Next version will adopt JPEG format too, but it runs slower, i.e., bringing about low FPS performance, but can help saving disc space maybe)
So what to do if your photo is in JPEG
format for now? rename and save them in BMP format, just by using Microsoft mspaint, open and save as, enough; or if you have plenty photos to handle, you can relief your tedious job by using a very suitable
software for the purpose 每 ACDSEE, which could convert files in batch easily.
Any
way after you prepared your album, do the following steps:
(1)
Choose your album node, CFS, in this case. Remember you can name your album
folder to any name, but maybe CFS_1, CFS_2 ... should bring you more
convenience later on.

(2) Right click on CFS node of the directory tree, it will show ※Set as movie path left§ menu item.
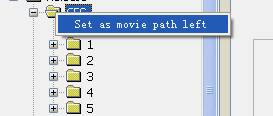
(3) Click this item, you*ll notice the path of your album already set in the Play List.
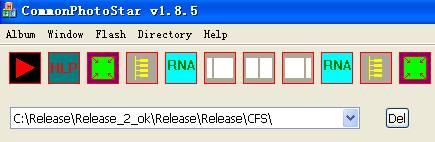
(4) Click the leftmost Play button
![]() now, you can view your album.
now, you can view your album.
Move your mouse horizontally, to watch all the pictures within a folder.
Turn your mouse wheel to switch among different folders.
Pressing down the wheel button and turn the wheel, to tune the brightness, it*s useful during night.
IMPORTENT: don*t leave a Search Window opening within your computer. This is a known bug,
could automatically moving to the leftmost picture. Just close it if you find a Windows Explorer Search window. (We tested on Windows XP)
Lower brightness to avoid stimulating eyes. (Pressing down the middle wheel and turn the wheel)
(5) By pressing the right button and turn the middle wheel, you can turn any picture to any angle!
(6) You can record movies for all the pictures or selected pictures in your album. your movies will be automatically serialized to becoming permanent, so next time you start up CommonPhotoStar you can open your album and play the movies directly. Angles for all pictures still remembered.
(7) To delete the movie, just click the Del button next to the play list.
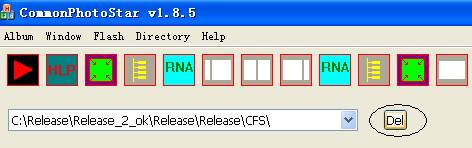
After clicking Del button, movie will be deleted, but it will never delete the pictures in your album, so you still could repeat the above steps to setting up new movies.
Hereby lets talking about the symmetrical user interface of CommonPhotoStar. It*s mainly for the convenience of album preparing design of the future version. Right now, the dual interface could still bring you benefits such as you can do the above steps for the right Play List too, so you can record different movies with different effects.
Yes, there should be more tricks wanting to be discussed, yet it will make the Help file too long to bother users reading. Maybe functions are good if they are self-explanatory. Thus we should finish now to allow users* trial and succeed.
CommonPhotoStar team.
http://www.commonphotostar.com
July 20, 2010